Wednesday, February 29, 2012

Leap into Action

Happy Leap Day everyone!

As we all know, leap day comes around about once every four years, so I decided to celebrate by doing some else I only do about once every four years....clean out my dresser!

To make the chore more interesting I decided to line the drawer bottoms with colorful wrapping paper.
It was easy.
I used my sewing tape measure (the floppy one) to measure the drawer bottoms, cut the paper to side, and used regular tape that I rolled into O shapes to adhere it to the drawer bottoms.

If I can do it, you can do it! 
Just this little trick has turned my chest of drawers into a nightmare of forgotten clothes, into a pretty piece of furniture that I enjoy opening every morning.

I hope this has inspired you to make a little change around your home that will make a big impact!

Before - Disaster!

During - Don't mind that giant clothes pile, most of it came out of the drawers!

Biscuit had to help, of course

Finished!! It looks great. I folded up ALL the clothes that I put back in the dresser, and did not over-stuff the drawers so I could see the pretty paper.

Tuesday, February 28, 2012

I made it onto Ikea Hackers!

I've reached a blog milestone! My Ikea Rast makeover was featured on Ikea Hackers!

I want to thank Jules, the owner & operator of Ikea Hackers, for her dedication towards the blog. It was so much fun to see my work featured on such a well-known blog; I'm sure everybody else that is featured on her blog feels the same way!

Check out my post here:


Monday, February 27, 2012

Finishing a UFO! (Unfinished Object)

Now, I like to think that I am the type of person who starts a project, and doesn't start another project until the first one is finished. 
However, I am not that type of person. ;-)
I'm about 50-50, really. Fifty percent of the time I'll finish a project that I started within a reasonable amount of time. And the other fifty percent of the time I'll start a project and never, ever finish it. Then, without warning, it becomes a UFO - otherwise known as the dreaded unfinished object. 

This particular UFO was started in 2010, back when S and I lived in our second home. I had recently discovered the world of designer fabrics, purse patterns, & all the glorious ideas that come along with the sewing world. I was elated! I bought yards upon yards of beautiful fabrics & many, many patterns.
When I first sat down to begin my first project, something happened. 
I realized that all the fabric I had just spent hours picking out & days waiting for it to be shipped, this fabric, well it was just too beautiful to cut into! 
I was scared; I did not want to ruin the perfection of an entire yard of premium fabric.
So, I waited a few more weeks, slowly building up the courage to make that first cut.

The first purse pattern I wanted to tackle is this one, by Izzy & Ivy.
I loved (and still love!) the contrasting trim fabric & body fabric. I love the metal details on the handles. I also love the shape & the bow! The pattern arrived in a cute paper envelope, and the pattern was drawn on medium weight white paper, not the slippery tissue paper that I was expecting. The pattern was easy enough to cut out, that did not take too much time. I had bought some nice fusible fleece to line the bag with, and I also decided to install a magnetic clasp to help the bag stay closed.

I had all the trappings to finish this bag! Somehow though, life got in the way of my sewing dreams. I'm not sure how many hours I spent working on the purse while I was in Silver Spring, but I only got about 1/3 of the body sewn together. And there it sat, for over a year!

A few days ago, S & I decided to rearrange & tidy our home. It was then that I discovered the bag that was hiding my sad UFO. I decided that enough was enough, and I needed to finish the darn thing.

The funny part about this UFO is that I actually lost the pattern directions. I was able to locate all the fabric pieces that I cut out & all the paper pattern pieces, but not the directions!
I decided just to wing it. And you know what, it turned out awesome.  
I spent about four straight hours this afternoon finishing the bag, right down to the bow on the front!

After finishing this bag I had decided one thing: I'm still not entirely sure that I enjoy bias tape. I understand its use, and without it, this bag just would not work. I thoroughly read this tutorial & this tutorial on how to install bias tape, and mine did not turn out like the pictures in the tutorials. In my defense though, it was my first time!

That thought aside, I think I made a pretty sweet looking bag!    


Before I installed the handles

Close-up of zipper pocket, magnetic clasp, & slip pocket 

Close-up of handle part

Two handles & four handle tabs (I sewed the metal bits to the tabs first)

Close-up of the front bow

Its finished!

This purse is quite large, big enough for a large laptop, a cardigan, some books, some snacks, your wallet, & a small kitten.
I'm about 5'2 and this bag dwarfs me. I do enjoy a large bag though; more room to put all my stuff! 

I think this bag turned out just great!
And I love how well interfaced it is; it stands up on its own!
The fabric I used for the body & tie is by the very talented Tula Pink.
The navy fabric is a heavyweight canvas. I also used navy bias tape to complete the contrasting look.


I hope you have been inspired to go off & finish a UFO of your own!

Monday, February 20, 2012

DIY Vase

Hello! I found the inspiration for this project via Pinterest. Of course!
S bought me a bottle of this delicious Pinot Noir that has this fantastic rooster label. He knows that I enjoy roosters & Pinot Noir. He is such a great guy! I really love roosters so I really didn't want to just drink the wine and recycle the bottle. I wanted to keep the bottle forever because it makes me smile!

First I painted a layer of polycrylic over the cute label. I let that dry for a day, then painted a second coat, and let that coat dry for two days. I used painters tape to carefully cover the label where I did not want to get any paint.
I used puffy paint to make a million little dots all over the bottle. I let the puffy paint dry for a day.
(Lots of waiting with this project!)
After the puffy paint was dry, I spray painted the entire bottle. I let the spray paint dry for about ten minutes, then carefully pulled the painters tape off the label.
Then I let the bottle dry for another full day.
Then I put it on my mantle, next to my fish bottles, and it was pretty!


I have been keeping my cupcake flags in my new rooster vase & fish bottles.
I think my new vase looks so cute up on my mantle with all my other bottles!


Happy President's Day!

Saturday, February 18, 2012

How to Throw an Awesome Super Bowl Party

I love hosting parties!
I have figured out that there are a few necessities you need in order to throw a great party.

1. Fun friends!
2. You! Are you a fun person? Are you able to roll with the punches?
3. Prizes. People love prizes. 

That's it!
Well, actually it is probably a good idea to feed your guests. Serving some delicious food is always a good idea when hosting a party. You don't even have to make the food yourself. I love to cook, but when I throw a party, I like to cheat the food a little bit and not cook 100% from scratch. That way I can enjoy my guests & the party.   If you like drinking adult beverages, having some delicious beer & spirits on hand is also a great idea. 
Most of the time you guests will end up bringing food & drinks to share. Sharing is always awesome.

I know the Super Bowl was so three weeks ago, but I just got around to finishing this post now. 
We had a really great party all around, but I think my favorite part ended up being totally unplanned.

Nearly everybody that came over to party with us was sporting some sort of "non-traditional" Super Bowl outfit.

The Breakdown:
Orioles Jerseys: 2
Ravens Jerseys: 2
Soccer (Futbal) Jerseys: 1
Redskins Tshirts: 1

None of us in Baltimore (except for that Patriots fan we let inside on accident) was impressed with either team that made it to the Bowl. I think we all addressed the situation perfectly!
  
I'm so excited to share our Super Bowl party with you!


S & I made meatballs.


We actually made an army of meatballs.


I used four ingredients for the meatball glaze. 
It was so easy. I mixed everything up the day before, let it marinate overnight in the fridge, then heated it up in the crock-pot. I cooked the meatballs in the oven, then added them to the crock-pot. 
I love crock-pot foods for parties because they stay warm the entire duration of the event!


I also made Spinach & Ricotta Puffs & 7 Layer Dip.

One of our friends was awesome & made Football Cupcakes with purple frosting! (Purple was for the Baltimore Ravens, who were in the Super Bowl of course...did we watch the same game?!) 


Another friend of ours made a fantastic custom Super Bowl Cookie! He is truly a baking master.


 I gave the cheeses flag labels. 


I made Jello Shots!
You like my Redskins Tshirt?


S & I wrote up a whole bunch of Prop Bets!
This was such a fun idea! I wrapped up a bunch of little prizes for the winners (and sometimes the winners took shots!)
We offered up two big prizes:
One for the person who guessed closest to the final score
And One Grand Prize for the person who got the most Prop Bets correct
(The same person actually ended up winning both, but we like him so all was good!)


The Projector!
We all got to watch the game in big style


These were the little prizes
What fun!


I wrapped them all up & let the winners chose their prize.
The only thing better than winning a prize, is winning a wrapped prize & getting to unwrap it!


The Final Score Prize was an elite candy bar (not pictured).


The GRAND PRIZE (for the person who got the most prop bets correct) was a pair of Baltimore Orioles baseball tickets!
(Yeah, S and I rock out in the gift-giving category.)


Well, I hope I have inspired you to put on your party pants & host a fantastic party in the future!
Enjoy the rest of your weekend!

Friday, February 17, 2012

How To Turn a Bookshelf Into a Bar

S and I love to entertain & hang out with our friends. We also have a newly-discovered interest in fine cocktails & martinis. (We used to be mostly craft beer kind of people). 

A consequence of our new mixology interest is that we now have too many liquor bottles. Our kitchen is super tiny, with about zero room for liquor bottles. 
Whenever the occasional bottle of tequila or bourbon made it into our home we would keep it in the cabinet above the stove, but I don't think fine liquor should be stored so close to a major heat source.  
So, the idea for a dry bar in our home was born!

We have these beautiful built-ins on one wall of our living room. The bookshelves are stuffed with...books...among other decorative items. It was a struggle to find new homes for the items on the one shelf we were rehabbing into the bar.

But, I did not let the struggle deter me from my goal!
It took about an hour to move all the stuff on the bookshelf, adhere the paper to the wall (we used industrial strength double sided tape), and arrange the liquid deliciousness.
(Then it took nearly an hour for me to take about a million pictures of our new space!)

I bought the fun blue & gold paper from an awesome store here in Baltimore, Trohv. I think the paper was intended to be used as wrapping paper, but I thought it made the perfect faux wall-paper.
Trohv is packed full of quirky home goods & gifts. Every time I visit the neghborhood of Hampdon I always make a point to visit Trohv. Just walking through the store is enough to put a smile on my face, although I seldom leave empty-handed!

I know what you're thinking..."just show me the Before & After already!"
Ok, ok, here you go!


I hope you have been inspired to go off & create your own dry bar for entertaining this weekend! 

Thursday, February 16, 2012

Pinterest Thursday!

Oh my goodness, is it Thursday again?? 
I've been so bad about publishing my posts this week. I have half a dozen half-written posts, sadly waiting for me to finish writing and publish them already!

I guess today I'm saved though, because its time for Pinterest Thursdays!

Today's Pinterest inspiration is Turquoise Kitchens!
Turquoise is one of my most favorite colors. I love the happiness that I feel when surrounded by turquoise-colored items. I hope you find some inspiration today, courtesy of Pinterest!


How long has the homemade Leek & Potato Soup been simmering?


Love, love love!


I love handmade pottery.


I hope you enjoyed the eye candy today! Go off & be inspired!

Tuesday, February 14, 2012

Valentine's Day Round-Up

Today is a very, very special day! Not only is it Valentine's Day, which is awesome, but today is the day that the official Bonnaroo line-up was released.

Some of you may be saying to yourselves, what is this Bonnaroo thing? Well, prepare to be wowed! 
Bonnaroo is a music & camping festival that is put on each year in Manchester, Tenn during the first part of June. 
This year marks the 11th year that 80,000 music fans descent on Manchester, camp out for four days, listen to great music 24 hours a day, make new friends, and generally don't shower. It is awesome. 
The line-up is usually released around Valentine's Day, but this year it was dropped today at noon! What a great addition to an already glittery & fun holiday!


Now on to the other occasion that makes today special.
For those of you out there that enjoy Valentine's Day as much as me, I've rounded up a few V-Day inspired projects & recipes.
Please enjoy!  


Adorable Surprise balls from Ardor!


Geek-friendly Pop-Up Cards from Minieco


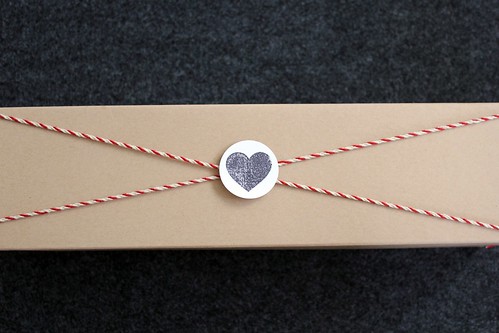
Fantastic Valentine's-Day-In-a-Box from one of my favorite blogs, You Are My Fave


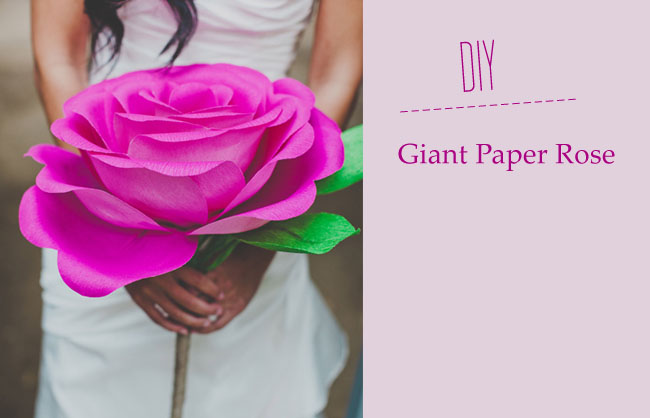
Totally Fantastic Paper Flower from Green Wedding Shoes


Really adorable felt hearts from The Purl Bee. 
Just think of how many places you could hide these in!


I wish a glittery & fun Valentine's Day to all of you out these!

Monday, February 13, 2012

I'm on Twitter!

Hi everybody! I'm on Twitter now!

Follow me as I tweet about how life is over here @HeyBmoreFish


Thursday, February 9, 2012

Pinterest Thursday!

Today is Thursday, and you know what that means! 
Check out all the rainbow-tastic items I found on Pinterest today.


Hardened String Balloon Forms. So Cool.


Beautiful Felt Triangle Decorations


Beautiful Rainbow Chopsticks from MOMA


Rainbow Jello Shots! Cheers!


Rainbow Layer Cake


Rainbow Fruit!


Rainbow Plush Fish


Beautiful Rainbow Hair