Monday, March 12, 2012

DIY Green Earrings for St. Patrick's Day

I really enjoy St. Patrick's Day. I love the celebrations, the Irish food, the fun, & the green! 
This whole week I'm going to be celebrating one of my favorite green holidays! Today I'm featuring a mini-tutorial on how to make your own green earrings.

This was a spur of the moment project. (The project I was going to start the week off with will be featured in a few days!) S and I took a walk around our neighborhood earlier this afternoon because it was such a warm & beautiful day here in Baltimore. In fact, some readings stated that the temperature reached 80 degrees in our neighborhood! So excited for summer!
So, on our way back home from lunch, we passed this bead store that I always drive past on my way home from work, but have never visited. I dragged S inside to look around, and instantly became smitten. There were So. Many. Beads. 
They were all arranged by color. It truly was a wonderful site to behold...almost like being in the middle of a rainbow! 
Immediately I found these awesome glass rooster beads. I'm not sure what I will do with them, but I knew I had to have them. 

So cute, right?

After I secured these roosters, I was wondering around, almost in a daze, not really sure what to do but look at all the pretty, shiny beads. I think S noticed my semi-state of shock and he mentioned to me that it would be neat if I made my own earrings for St. Patrick's Day & feature them on my blog! 
Ba-zing! I quickly picked out some green beads & we were quickly on our way.

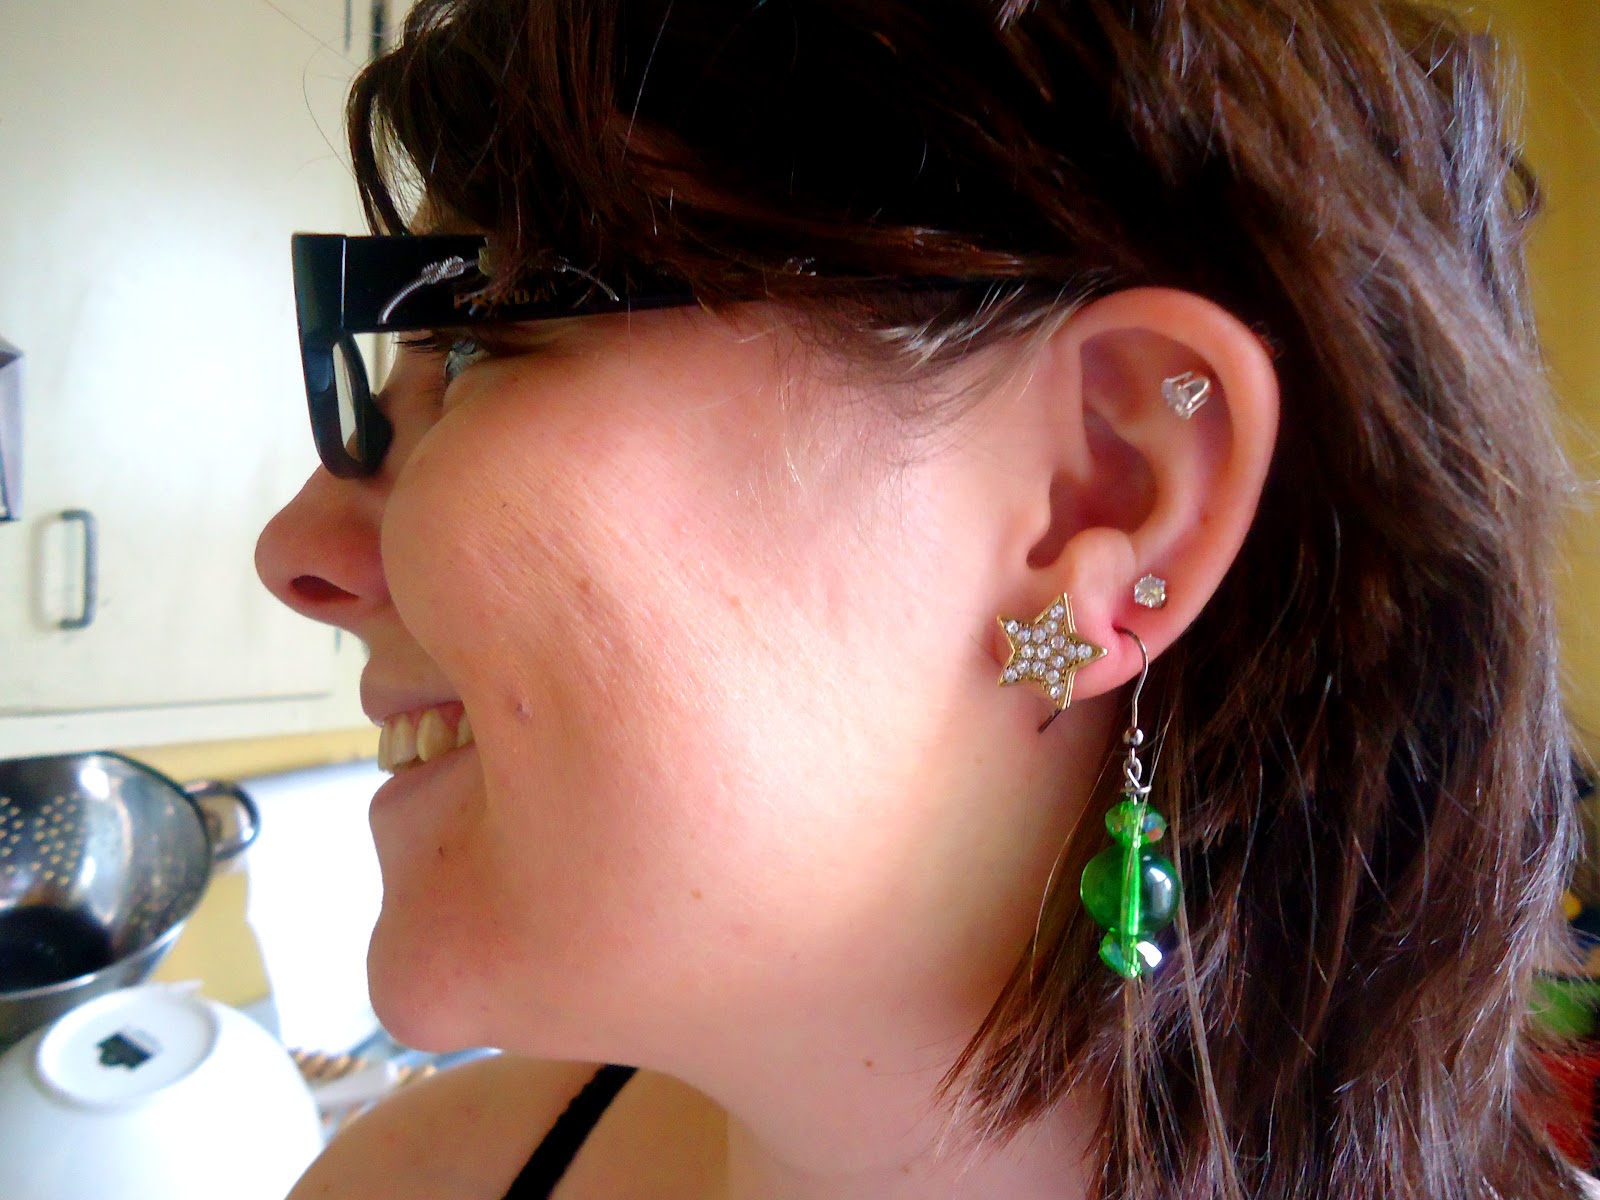
These pretty things were straightforward to make. I threaded the beads onto the straight pins, then used my needle-nose pliers to twist the straight pin onto the earring part. The round beads made the project a bit challenging, what with trying to grip the beads while simultaneously using the pliers to bend the straight pin, but the end product was worth the struggle!

Biscuit wanted to hang out with my bead goodies

The beads, straight wire pins, & earring wires

The green beads

After about fifteen minutes of fighting with green beads & wire, I had a fun pair of new earrings!

Green earrings & Harry Potter

Ready for St. Patrick's Day!
Friday, March 9, 2012

Bottle Cap Mirror

It is no surprise, I love IKEA. Many items at IKEA have very simple & clean lines, just begging to be customized! IKEA has carried the MALMA mirror for years now. From the first time I saw it, I knew I had to use it to make something really neat. 

I work at a very fun restaurant. We carry over 200 different types of bottled beer, many of which have really interesting bottle caps. I knew that I could combine my love of beer, my access to many different types of bottle caps, & my love of IKEA to make an interesting mirror for my home.


I bought this plain, black mirror from IKEA


Used painters tape to mask off the mirror part


Primed the mirror with spray-on Zinsser primer. This primer is awesome, it sticks to everything. The finish on the mirror was smooth & shiny, so I knew I needed to use Zinsser in order to make my paint stick.


I used neon pink spray paint from Montana Gold to paint the mirror. This is the same paint I used for my Neon Kitchen Makeover. I just love bright colors. 


I used hot glue to adhere the bottle caps to the mirror. The dimensions of the mirror allowed for exactly nine caps to fit across & nine down. It was perfect!


Close-up!


I'm not finished yet! It is looking really cool so far thought, I wanted to show it to you. 
I love the contrast between the bright, neon paint & the bottle caps.


I hope you have been inspired to personalize a piece from IKEA for yourself!
As always, thanks for stopping by & reading. 

Thursday, March 8, 2012

Pinterest Thursday!

It's Thursday...you know what that means! 
Today's inspiration is one of my most favorite colors. Seriously, I can't help but smile when I see something pink!
I hope you find some pink inspiration from today's Pinterest finds!


Love this textile! 


Yellow chevron & pink chairs....perfection!


Pink triangles...so cool


Pink & Zebra!


This is just wonderful. What a bright & happy shade of pink.


I hope you enjoyed the pink today.
Thanks for joining me for Pinterest Thursdays!

Wednesday, March 7, 2012

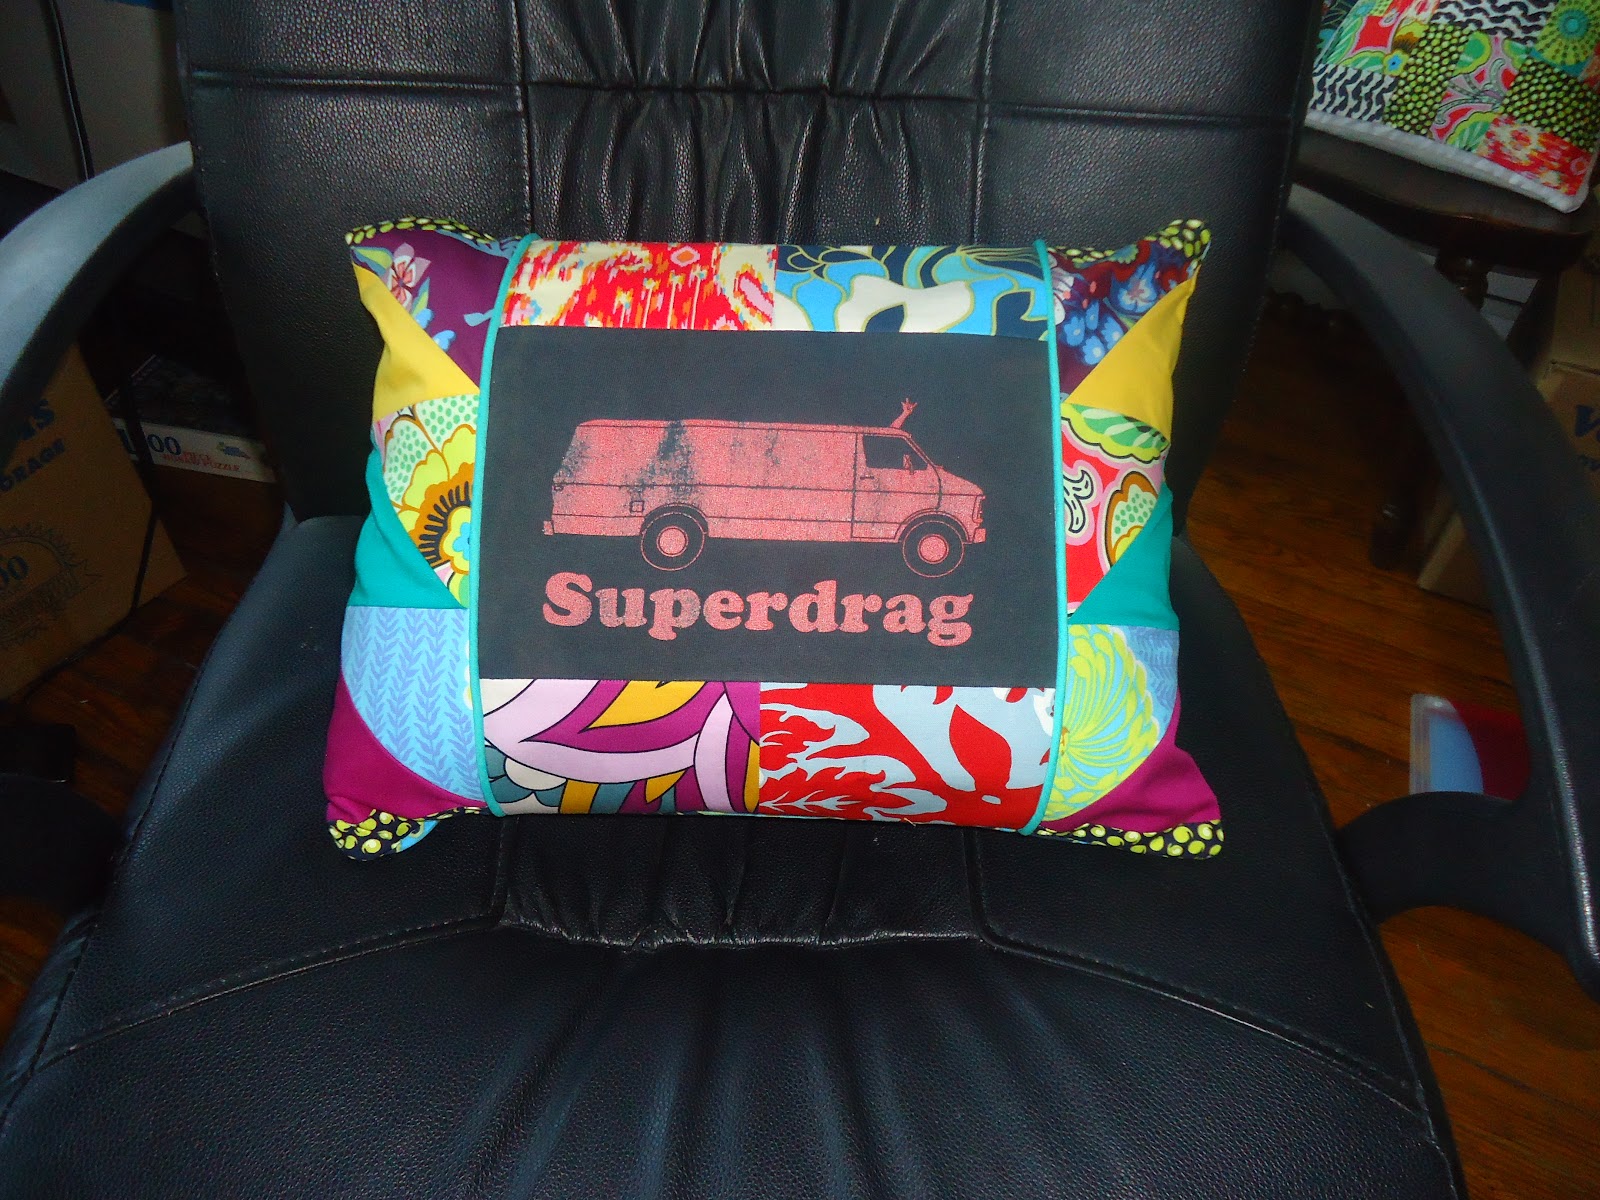
Superdrag Pillow!

I love sewing & I love music. I also love re-using things that were otherwise going to be thrown away. 
These three loves of mine were the inspiration for my latest project - the Superdrag pillow!

S loves live music & as a result, he has so many concert t-shirts. We have been steadily going through our belongings & trying to downsize. The other weekend we both went through our closets & compiled three large trash bags of clothes we wanted to donate to Goodwill. Some of our clothes were un-donateable...really, unwearable, on the last thread of their existence.
While I do not mind tossing out old socks with holes in them & other like-minded clothes, I could not stomach S wanting to toss out some of his old concert t-shirts! I mean, those things have a history! Concert t-shirts should last forever, even if they have holes in the armpits & fraying threads everywhere. 

Concert t-shirts are reminders of good times that were had & should be kept forever!  

Since S was not as moved as I was, I confiscated his three concert t-shirts from the trash pile & made the decision to make pillows out of them. I mean, he had had the Superdrag t-shirt for over 10 years....I could not let him throw it away!

I spent all day yesterday making this one so I could surprise S when we saw each other at the end of the day.
I finished it just in time & he was surely surprised! 
I was happy. =)


I hope you are inspired to re-use an item of yours that was destined for the trash bin & make it into something beautiful!


Before!

Check out the frayed collar

And the holes in the armpits!
This t-shirt is perfect to me......I can't believe S wanted to toss it away!

I drew up my own "pattern". I re-did the measurements a few times, but in the end the project turned out exactly how I wanted.


During!

Front panel
I interfaced every piece of fabric that went into this pillow.
I used a mix of vintage t-shirt, vintage canvas, designer quilting fabric, non-designer quilting fabric (the yellow), & a random piece of hippie-looking fabric I bought in 2009.

The entire front - finished
I cut & pieced those triangle pieces myself!
And check out that aqua piping---awesome!

The front & back panels - I opted for an exposed zipper for a quirky look


After!


Click the pictures to make them bigger!


Back zipper detail


Side detail

Other side detail

Biscuit & the Superdrag Pillow!


Thursday, March 1, 2012

Pinterest Thursday!

It is Thursday, and that means I get to share some more Pinterest love with you!

Today's inspiration is: Turquoise for the Home.
I hope you enjoy!


I am still trending on the chevron pattern.


I love the striped oval rug.


We have six dark brown wood dining chairs that we thrifted last year. I would love to paint them all a different, fun color. 


I hope you enjoyed today's Pinterest offerings.
Go forth and be inspired!

Wednesday, February 29, 2012

Leap into Action

Happy Leap Day everyone!

As we all know, leap day comes around about once every four years, so I decided to celebrate by doing some else I only do about once every four years....clean out my dresser!

To make the chore more interesting I decided to line the drawer bottoms with colorful wrapping paper.
It was easy.
I used my sewing tape measure (the floppy one) to measure the drawer bottoms, cut the paper to side, and used regular tape that I rolled into O shapes to adhere it to the drawer bottoms.

If I can do it, you can do it! 
Just this little trick has turned my chest of drawers into a nightmare of forgotten clothes, into a pretty piece of furniture that I enjoy opening every morning.

I hope this has inspired you to make a little change around your home that will make a big impact!

Before - Disaster!

During - Don't mind that giant clothes pile, most of it came out of the drawers!

Biscuit had to help, of course

Finished!! It looks great. I folded up ALL the clothes that I put back in the dresser, and did not over-stuff the drawers so I could see the pretty paper.

Tuesday, February 28, 2012

I made it onto Ikea Hackers!

I've reached a blog milestone! My Ikea Rast makeover was featured on Ikea Hackers!

I want to thank Jules, the owner & operator of Ikea Hackers, for her dedication towards the blog. It was so much fun to see my work featured on such a well-known blog; I'm sure everybody else that is featured on her blog feels the same way!

Check out my post here:


Monday, February 27, 2012

Finishing a UFO! (Unfinished Object)

Now, I like to think that I am the type of person who starts a project, and doesn't start another project until the first one is finished. 
However, I am not that type of person. ;-)
I'm about 50-50, really. Fifty percent of the time I'll finish a project that I started within a reasonable amount of time. And the other fifty percent of the time I'll start a project and never, ever finish it. Then, without warning, it becomes a UFO - otherwise known as the dreaded unfinished object. 

This particular UFO was started in 2010, back when S and I lived in our second home. I had recently discovered the world of designer fabrics, purse patterns, & all the glorious ideas that come along with the sewing world. I was elated! I bought yards upon yards of beautiful fabrics & many, many patterns.
When I first sat down to begin my first project, something happened. 
I realized that all the fabric I had just spent hours picking out & days waiting for it to be shipped, this fabric, well it was just too beautiful to cut into! 
I was scared; I did not want to ruin the perfection of an entire yard of premium fabric.
So, I waited a few more weeks, slowly building up the courage to make that first cut.

The first purse pattern I wanted to tackle is this one, by Izzy & Ivy.
I loved (and still love!) the contrasting trim fabric & body fabric. I love the metal details on the handles. I also love the shape & the bow! The pattern arrived in a cute paper envelope, and the pattern was drawn on medium weight white paper, not the slippery tissue paper that I was expecting. The pattern was easy enough to cut out, that did not take too much time. I had bought some nice fusible fleece to line the bag with, and I also decided to install a magnetic clasp to help the bag stay closed.

I had all the trappings to finish this bag! Somehow though, life got in the way of my sewing dreams. I'm not sure how many hours I spent working on the purse while I was in Silver Spring, but I only got about 1/3 of the body sewn together. And there it sat, for over a year!

A few days ago, S & I decided to rearrange & tidy our home. It was then that I discovered the bag that was hiding my sad UFO. I decided that enough was enough, and I needed to finish the darn thing.

The funny part about this UFO is that I actually lost the pattern directions. I was able to locate all the fabric pieces that I cut out & all the paper pattern pieces, but not the directions!
I decided just to wing it. And you know what, it turned out awesome.  
I spent about four straight hours this afternoon finishing the bag, right down to the bow on the front!

After finishing this bag I had decided one thing: I'm still not entirely sure that I enjoy bias tape. I understand its use, and without it, this bag just would not work. I thoroughly read this tutorial & this tutorial on how to install bias tape, and mine did not turn out like the pictures in the tutorials. In my defense though, it was my first time!

That thought aside, I think I made a pretty sweet looking bag!    


Before I installed the handles

Close-up of zipper pocket, magnetic clasp, & slip pocket 

Close-up of handle part

Two handles & four handle tabs (I sewed the metal bits to the tabs first)

Close-up of the front bow

Its finished!

This purse is quite large, big enough for a large laptop, a cardigan, some books, some snacks, your wallet, & a small kitten.
I'm about 5'2 and this bag dwarfs me. I do enjoy a large bag though; more room to put all my stuff! 

I think this bag turned out just great!
And I love how well interfaced it is; it stands up on its own!
The fabric I used for the body & tie is by the very talented Tula Pink.
The navy fabric is a heavyweight canvas. I also used navy bias tape to complete the contrasting look.


I hope you have been inspired to go off & finish a UFO of your own!

Monday, February 20, 2012

DIY Vase

Hello! I found the inspiration for this project via Pinterest. Of course!
S bought me a bottle of this delicious Pinot Noir that has this fantastic rooster label. He knows that I enjoy roosters & Pinot Noir. He is such a great guy! I really love roosters so I really didn't want to just drink the wine and recycle the bottle. I wanted to keep the bottle forever because it makes me smile!

First I painted a layer of polycrylic over the cute label. I let that dry for a day, then painted a second coat, and let that coat dry for two days. I used painters tape to carefully cover the label where I did not want to get any paint.
I used puffy paint to make a million little dots all over the bottle. I let the puffy paint dry for a day.
(Lots of waiting with this project!)
After the puffy paint was dry, I spray painted the entire bottle. I let the spray paint dry for about ten minutes, then carefully pulled the painters tape off the label.
Then I let the bottle dry for another full day.
Then I put it on my mantle, next to my fish bottles, and it was pretty!


I have been keeping my cupcake flags in my new rooster vase & fish bottles.
I think my new vase looks so cute up on my mantle with all my other bottles!


Happy President's Day!