Showing posts with label Party. Show all posts

Tuesday, July 3, 2012

Bottle Cap Mirror - Finished!

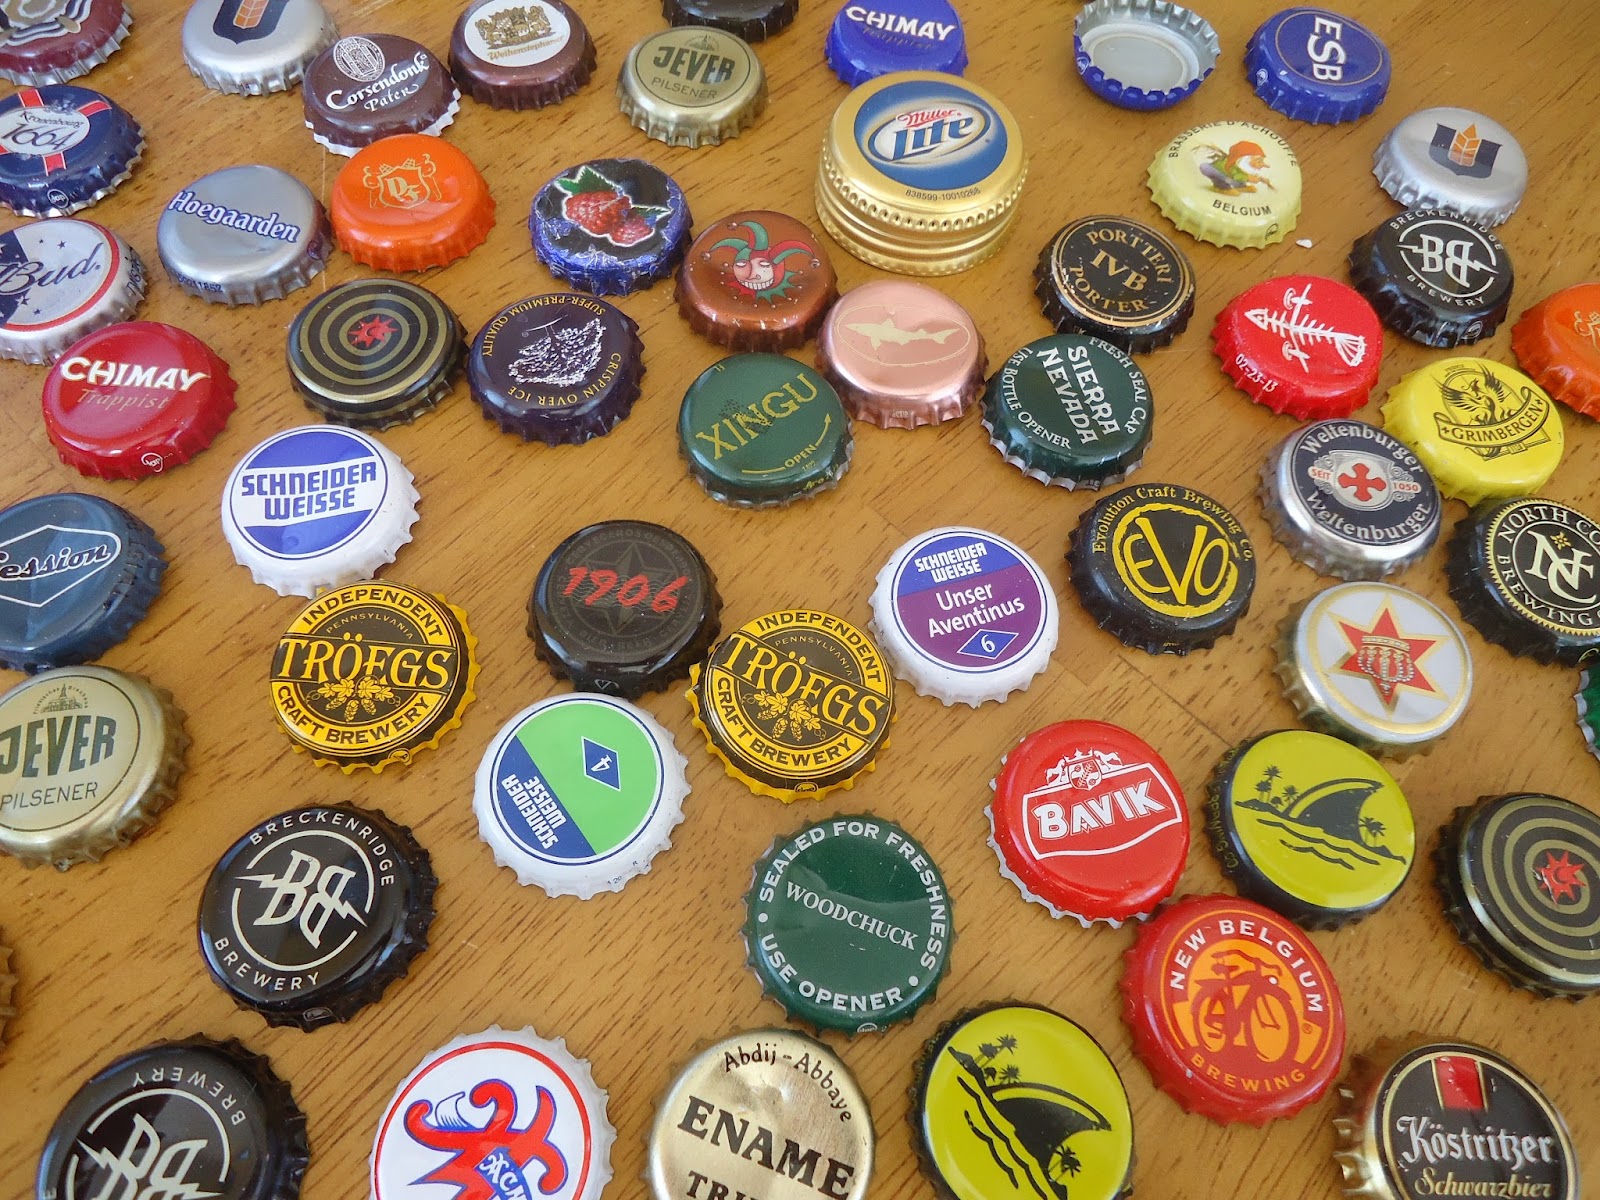
After many months of selling fine beer at the restaurant I work at, I have finally collected enough pretty & interesting bottle caps to finish my bottle cap mirror! (Disclaimer: I *did* have a little help from some work friends in collecting some of the bottle caps. Sharing is caring.)

To give you a reminder, this is what it looked like back in March when I began this project. I seriously underestimated the number of caps I needed to cover the entirety of the tiny mirror I picked out for this project. I specifically wanted something small, but it still required 72 caps! That is a lot of delicious beer!  

For this project I only wanted to use the caps from delicious beers (and a couple hard ciders). Sorry, jumbo Miller Lite cap, you no good for me.


And...it is finished!


I loved how it turned out. The hot pink I used for the main part of the mirror added the perfect pop of color. This project was very simple; the most difficult and time consuming part was collecting enough caps! After I spray painted the hot pink color onto the mirror I used my trusty hot glue gun to affix the caps, and that was it. This is the perfect project to use up all those bottle caps you will undoubtedly acquire after that big 4th of July party. I hope you will be inspired to create sometime unique and kind of kitschy for your home.

Thanks for reading!  

Monday, March 12, 2012

DIY Green Earrings for St. Patrick's Day

I really enjoy St. Patrick's Day. I love the celebrations, the Irish food, the fun, & the green! 
This whole week I'm going to be celebrating one of my favorite green holidays! Today I'm featuring a mini-tutorial on how to make your own green earrings.

This was a spur of the moment project. (The project I was going to start the week off with will be featured in a few days!) S and I took a walk around our neighborhood earlier this afternoon because it was such a warm & beautiful day here in Baltimore. In fact, some readings stated that the temperature reached 80 degrees in our neighborhood! So excited for summer!
So, on our way back home from lunch, we passed this bead store that I always drive past on my way home from work, but have never visited. I dragged S inside to look around, and instantly became smitten. There were So. Many. Beads. 
They were all arranged by color. It truly was a wonderful site to behold...almost like being in the middle of a rainbow! 
Immediately I found these awesome glass rooster beads. I'm not sure what I will do with them, but I knew I had to have them. 

So cute, right?

After I secured these roosters, I was wondering around, almost in a daze, not really sure what to do but look at all the pretty, shiny beads. I think S noticed my semi-state of shock and he mentioned to me that it would be neat if I made my own earrings for St. Patrick's Day & feature them on my blog! 
Ba-zing! I quickly picked out some green beads & we were quickly on our way.

These pretty things were straightforward to make. I threaded the beads onto the straight pins, then used my needle-nose pliers to twist the straight pin onto the earring part. The round beads made the project a bit challenging, what with trying to grip the beads while simultaneously using the pliers to bend the straight pin, but the end product was worth the struggle!

Biscuit wanted to hang out with my bead goodies

The beads, straight wire pins, & earring wires

The green beads

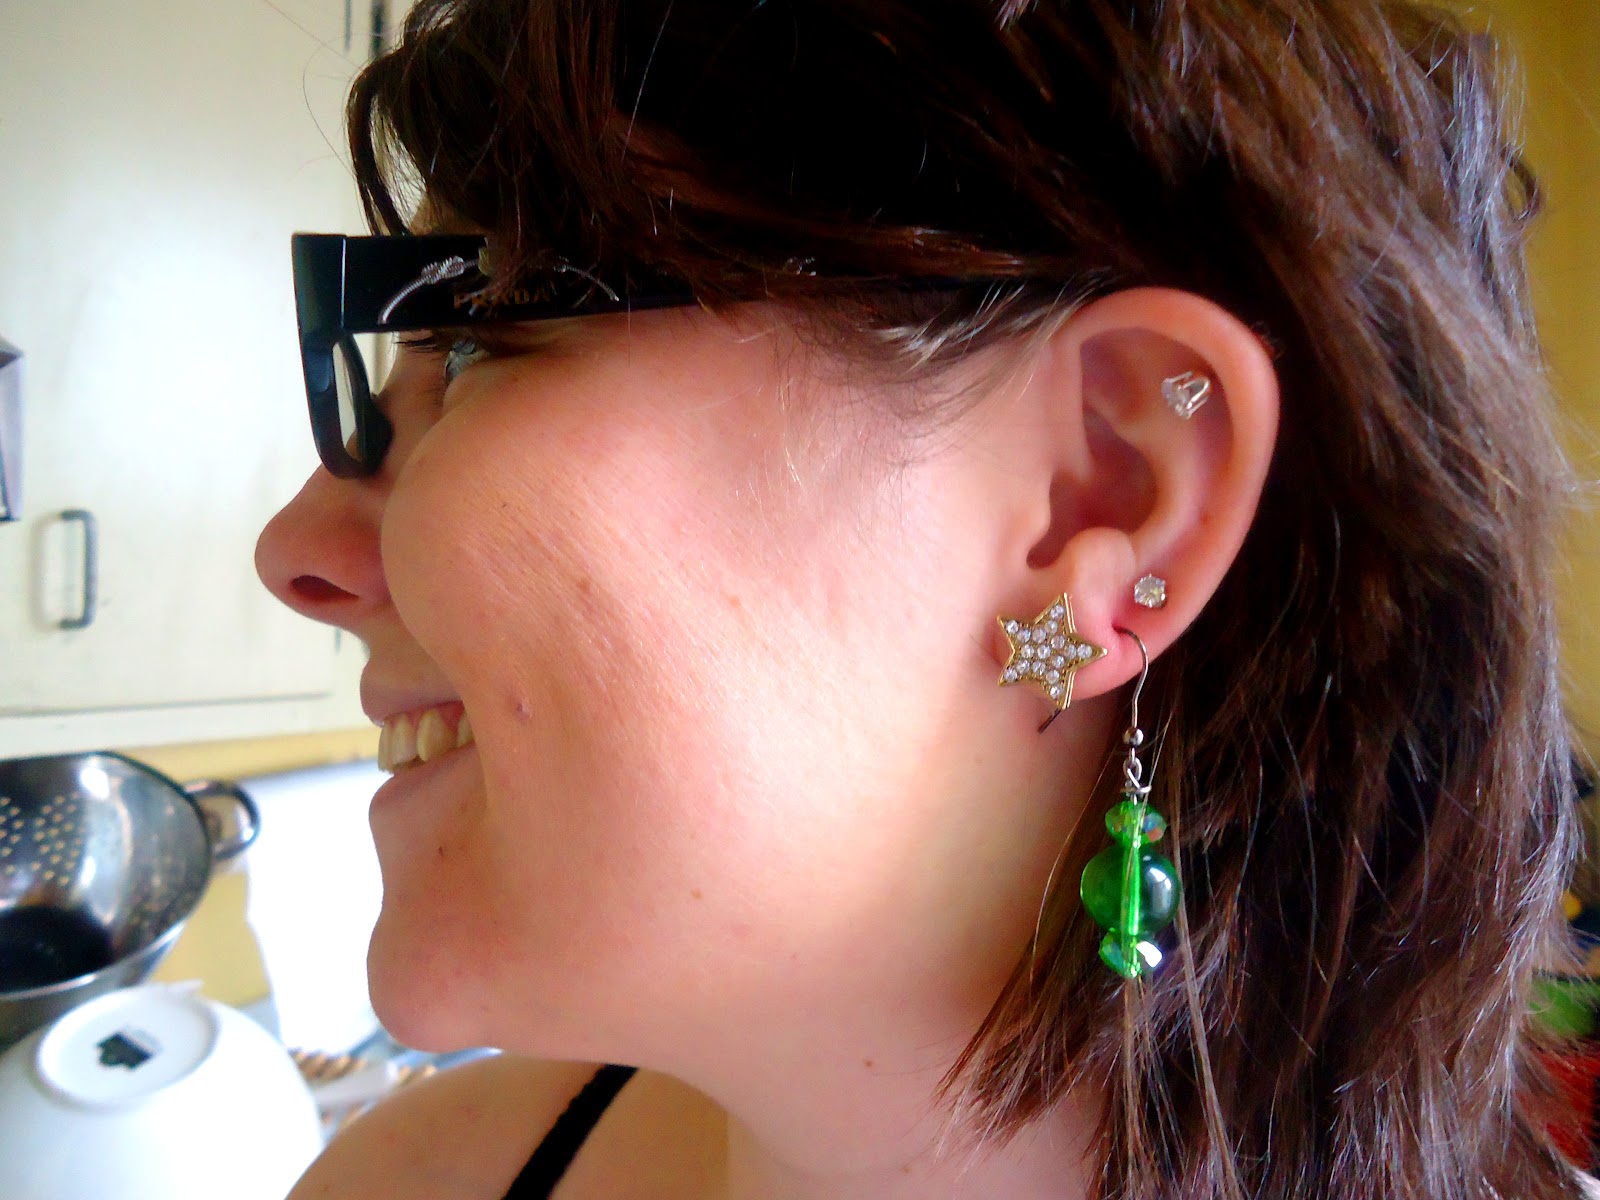
After about fifteen minutes of fighting with green beads & wire, I had a fun pair of new earrings!

Green earrings & Harry Potter

Ready for St. Patrick's Day!

Saturday, February 18, 2012

How to Throw an Awesome Super Bowl Party

I love hosting parties!
I have figured out that there are a few necessities you need in order to throw a great party.

1. Fun friends!
2. You! Are you a fun person? Are you able to roll with the punches?
3. Prizes. People love prizes. 

That's it!
Well, actually it is probably a good idea to feed your guests. Serving some delicious food is always a good idea when hosting a party. You don't even have to make the food yourself. I love to cook, but when I throw a party, I like to cheat the food a little bit and not cook 100% from scratch. That way I can enjoy my guests & the party.   If you like drinking adult beverages, having some delicious beer & spirits on hand is also a great idea. 
Most of the time you guests will end up bringing food & drinks to share. Sharing is always awesome.

I know the Super Bowl was so three weeks ago, but I just got around to finishing this post now. 
We had a really great party all around, but I think my favorite part ended up being totally unplanned.

Nearly everybody that came over to party with us was sporting some sort of "non-traditional" Super Bowl outfit.

The Breakdown:
Orioles Jerseys: 2
Ravens Jerseys: 2
Soccer (Futbal) Jerseys: 1
Redskins Tshirts: 1

None of us in Baltimore (except for that Patriots fan we let inside on accident) was impressed with either team that made it to the Bowl. I think we all addressed the situation perfectly!
  
I'm so excited to share our Super Bowl party with you!


S & I made meatballs.


We actually made an army of meatballs.


I used four ingredients for the meatball glaze. 
It was so easy. I mixed everything up the day before, let it marinate overnight in the fridge, then heated it up in the crock-pot. I cooked the meatballs in the oven, then added them to the crock-pot. 
I love crock-pot foods for parties because they stay warm the entire duration of the event!


I also made Spinach & Ricotta Puffs & 7 Layer Dip.

One of our friends was awesome & made Football Cupcakes with purple frosting! (Purple was for the Baltimore Ravens, who were in the Super Bowl of course...did we watch the same game?!) 


Another friend of ours made a fantastic custom Super Bowl Cookie! He is truly a baking master.


 I gave the cheeses flag labels. 


I made Jello Shots!
You like my Redskins Tshirt?


S & I wrote up a whole bunch of Prop Bets!
This was such a fun idea! I wrapped up a bunch of little prizes for the winners (and sometimes the winners took shots!)
We offered up two big prizes:
One for the person who guessed closest to the final score
And One Grand Prize for the person who got the most Prop Bets correct
(The same person actually ended up winning both, but we like him so all was good!)


The Projector!
We all got to watch the game in big style


These were the little prizes
What fun!


I wrapped them all up & let the winners chose their prize.
The only thing better than winning a prize, is winning a wrapped prize & getting to unwrap it!


The Final Score Prize was an elite candy bar (not pictured).


The GRAND PRIZE (for the person who got the most prop bets correct) was a pair of Baltimore Orioles baseball tickets!
(Yeah, S and I rock out in the gift-giving category.)


Well, I hope I have inspired you to put on your party pants & host a fantastic party in the future!
Enjoy the rest of your weekend!

Friday, February 17, 2012

How To Turn a Bookshelf Into a Bar

S and I love to entertain & hang out with our friends. We also have a newly-discovered interest in fine cocktails & martinis. (We used to be mostly craft beer kind of people). 

A consequence of our new mixology interest is that we now have too many liquor bottles. Our kitchen is super tiny, with about zero room for liquor bottles. 
Whenever the occasional bottle of tequila or bourbon made it into our home we would keep it in the cabinet above the stove, but I don't think fine liquor should be stored so close to a major heat source.  
So, the idea for a dry bar in our home was born!

We have these beautiful built-ins on one wall of our living room. The bookshelves are stuffed with...books...among other decorative items. It was a struggle to find new homes for the items on the one shelf we were rehabbing into the bar.

But, I did not let the struggle deter me from my goal!
It took about an hour to move all the stuff on the bookshelf, adhere the paper to the wall (we used industrial strength double sided tape), and arrange the liquid deliciousness.
(Then it took nearly an hour for me to take about a million pictures of our new space!)

I bought the fun blue & gold paper from an awesome store here in Baltimore, Trohv. I think the paper was intended to be used as wrapping paper, but I thought it made the perfect faux wall-paper.
Trohv is packed full of quirky home goods & gifts. Every time I visit the neghborhood of Hampdon I always make a point to visit Trohv. Just walking through the store is enough to put a smile on my face, although I seldom leave empty-handed!

I know what you're thinking..."just show me the Before & After already!"
Ok, ok, here you go!


I hope you have been inspired to go off & create your own dry bar for entertaining this weekend! 

Saturday, December 10, 2011

DIY Pop-Up Card

My nephew's third birthday is coming up soon, so I made him a pop-up card!
He was born December 9th, one day after me. He is my first nephew (or niece, for that matter). I think he's pretty awesome. 

I used thick scrapbooking paper (think: card stock), letters cut from various magazines for the front message, stickers, a glue stick, and lots of imagination. 

I kind of winged the pop-up part. I tested out the shape a few times with scrap paper before I found a shape I was happy with, and cut it out of the nice paper.

My sister called me after she, and said nephew, received the card to say thank you. Apparently my card was Ely's favorite! Sweet!


I wrapped Ely's present in zebra print tissue before I put it in the not-so-fun USPS mailer.
I think it is more fun for children & adults alike to rip into fun wrappings, rather than standard issue mailers!


Go forth and be inspired!

Friday, November 11, 2011

Skyrim Release Party!

I had the day off today, so I took it upon myself to pick up a copy of the newly-released Skyrim video game for S.
I brought home lots of video-game appropriate munchies for him also!
  

Enjoy your 11/11/11, whatever you may be up to!

Thursday, August 25, 2011

Football Party!

We love football in this home! I am a Washington Redskins fan and S is a Baltimore Ravens fan, which means that our teams play each other every couple years during the regular season, but usually every season we play against each other during preseason.
This year was a preseason game, and we decided to have a little party to help break in our new house, and celebrate the upcoming football season!

I made football shaped brownies!

I let the brownies cool completely before I cut them into football shapes.

I drew out my own template on white paper and used it to cut each football out of the giant sheet of brownies!

A couple of nice looking footballs.

I made a batch of royal icing and used a baggie with its corner clipped off to decorate the footballs. 
They look great, don't you think!

I also made my own scratch offs for half-time!
Using regular white computer paper, I printed the pictures & words I wanted on the scratch off.
I bought heavy duty scrapbooking paper from Michael's in burgundy (Redskins colors!) & purple (Raven's colors!). 
I also bought a sheet of the most awesome, sparkly gold scrapbooking paper. 
Everything is better with sparkles.

Using my paper cutters from Creative Memories, I cut all the paper down to size. 
I made up my own size for my home made scratch offs, they were approximately 2" x 5".

If I had known where my gluestick was, I would have used that to glue all the paper together. Unfortunately, I did not know where it was, so I used rolled up tape to piece these things together. 
I used the purple card stock as the base, then cut out a piece of burgundy half the size of the purple, and taped it on top. 
Then I cut a sliver of sparkly gold paper, and taped that over the middle.
Then I taped down the white paper with the pictures & words. 

They are starting to look awesome! 

To make the "scratch" part of the scratch off I used clear packing tape, metallic silver craft paint, & dish-washing liquid. 
First, I taped over the "Winner/Not a Winner" messages with clear packing tape. 
Next, I mixed equal parts metallic silver craft paint & dish-washing liquid on a plate. I used a tiny foam craft brush to carefully paint a silver rectangle over top of the clear packing tape, taking care not to get any paint off the sides of the tape.  

Biscuit helped, naturally.

It doesn't take too long for the paint to dry, I think I let mine sit for about an hour though.
Now you can scratch your way to victory!

S and I made caramel popcorn from scratch, one of our favorite party treats!
I found the recipe last year from this blog. We've made the recipe three times now, and each time it was a great success! Everybody we feed it to can't believe that it is homemade. That denotes a winning recipe in my book.

After he finished the caramel popcorn, S got into the spirit of the evening.

Comet is enjoying some pregame coffee table. 
Notice our Redskins & Ravens team blankets decorations. 

All together now!
Football brownies, ready for eating!
Homemade halftime scratch offs, ready for scratching!
I made a goodie bag of prizes for the halftime scratch off winner. 
Inside I put a whistle, a squishy stress ball shaped like a football, a glitter bouncy ball, and a homemade penalty flag

All of our friends loved their scratch offs, but only one person won!